
Leaks, Caulking, and the [Expletive] Shower Pan
January 22nd, 2017


More progress!
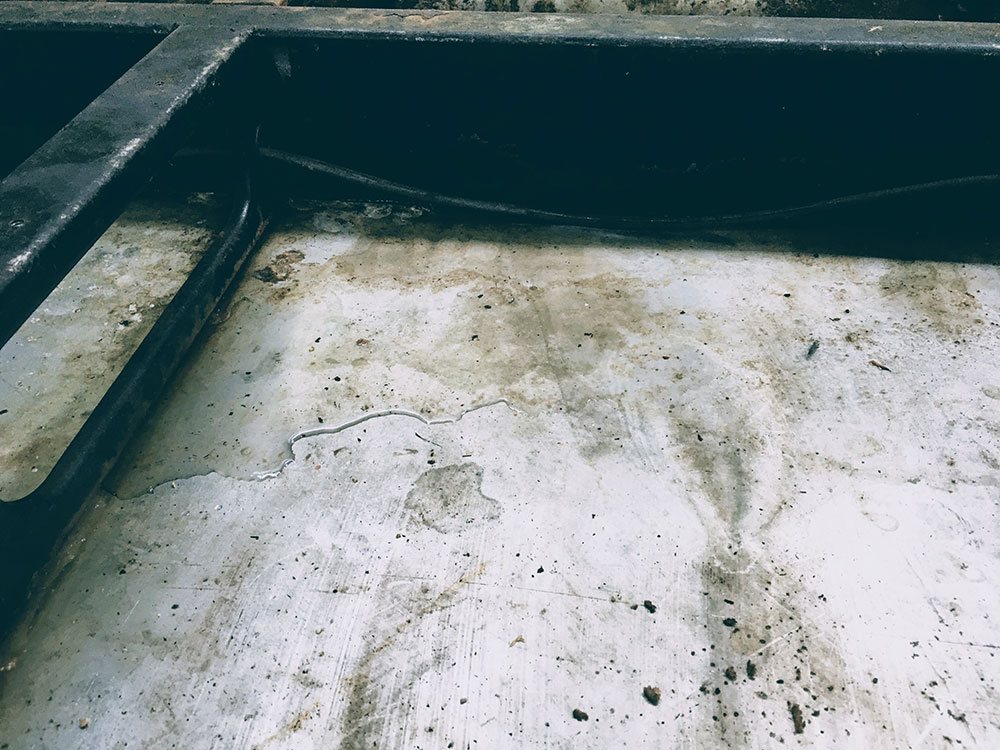
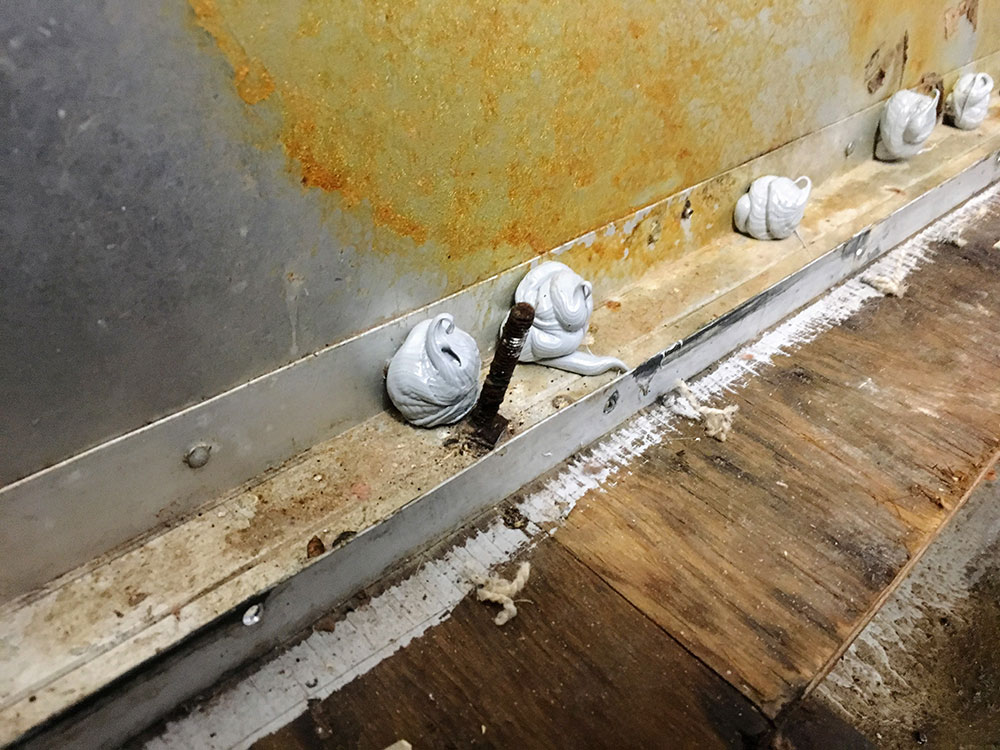
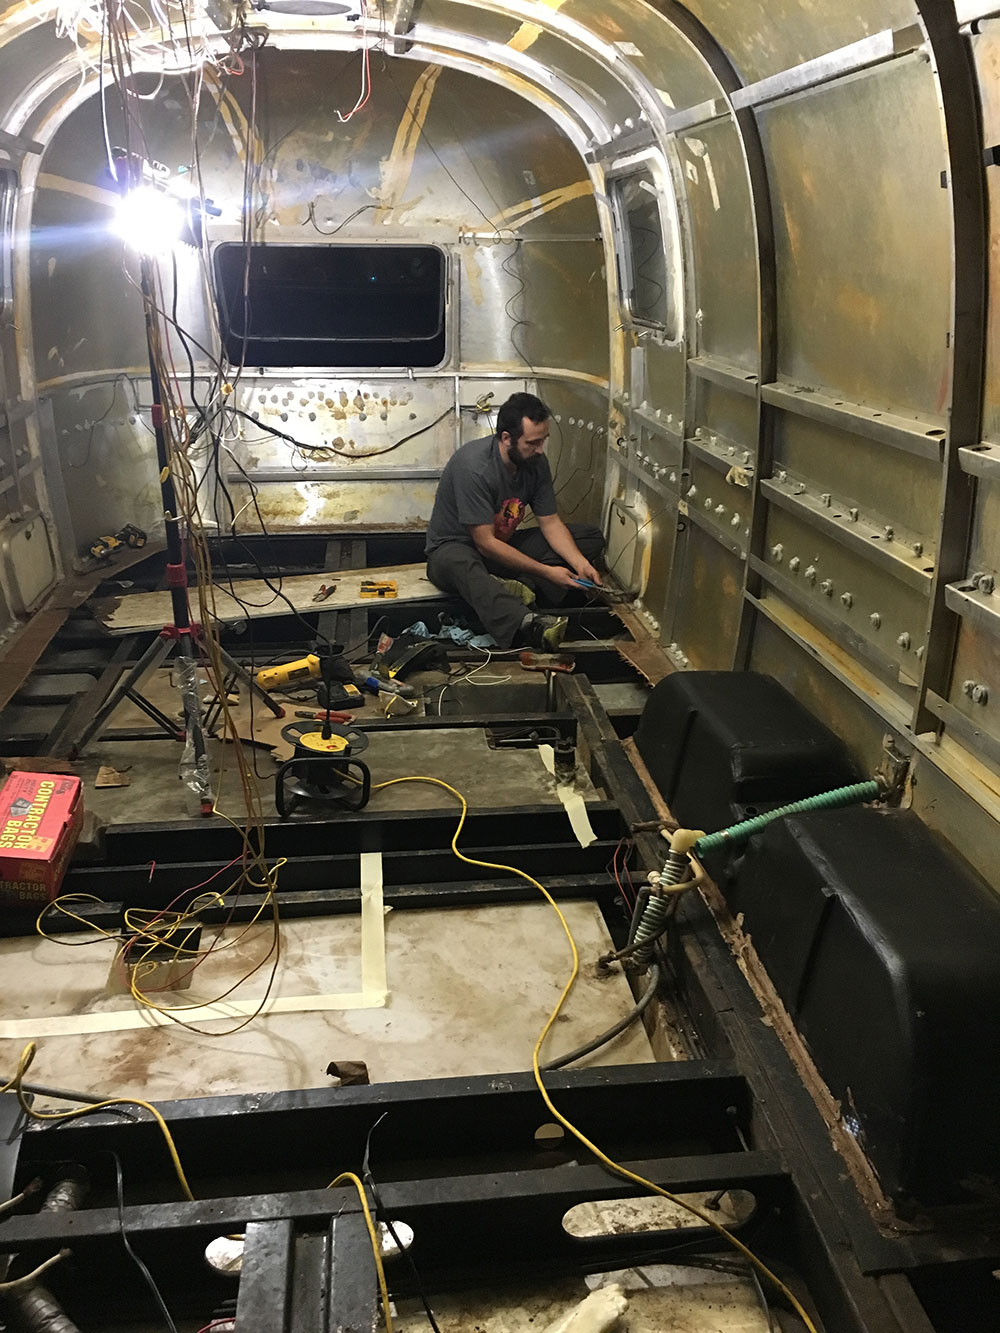
We had a lot of good intentions to have the subfloor completely replaced by this point, but other factors (weather) prevented us from doing so. In the end this proved to be a blessing in disguise, as the non-stop rain we've had the last week has revealed seemingly endless leaks and water in our belly pan:
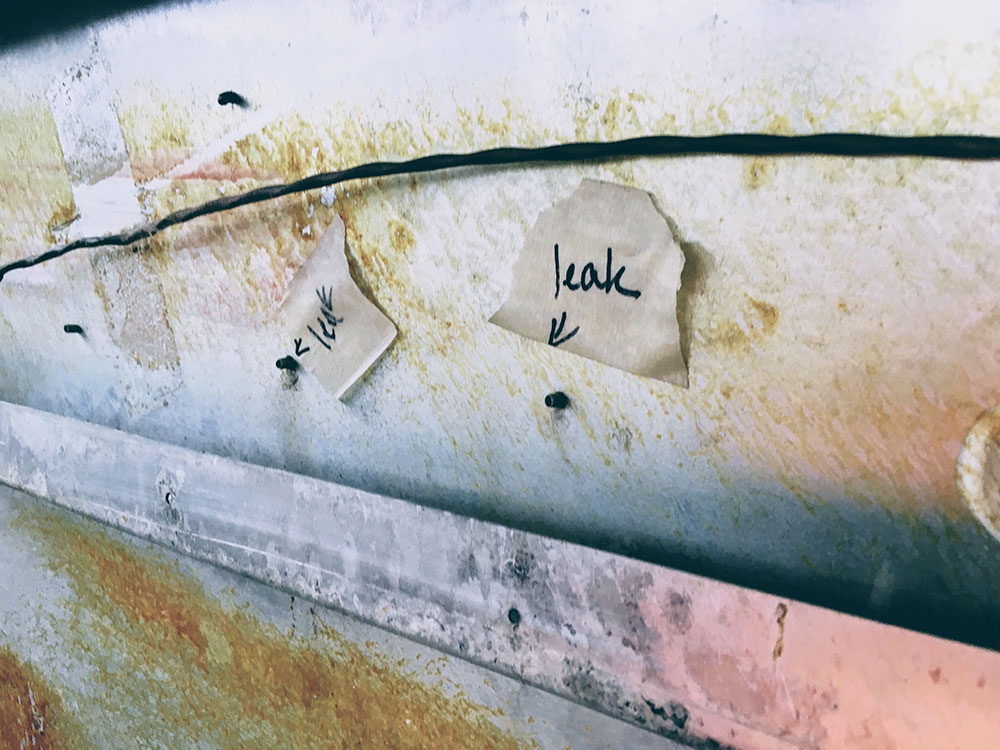
We took full advantage of this and marked out every leak with masking tape:
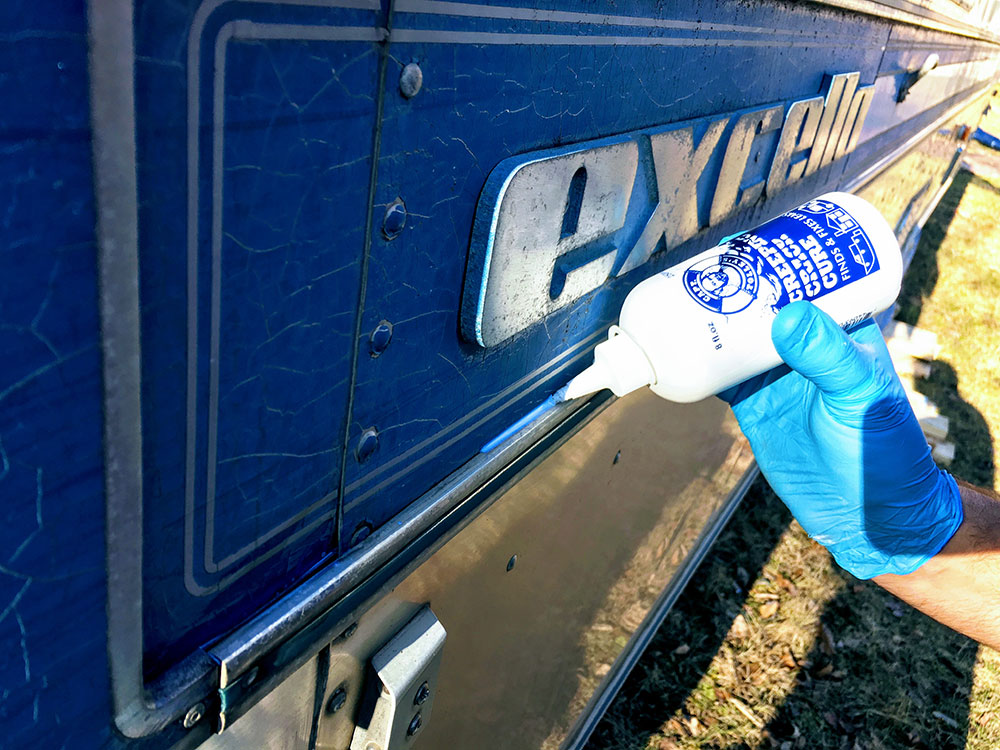
I spent way too many hours attempting to locate a local dealer in Kansas City who carried either Vulkem 116, Tempro 635, SikaFlex, or 3M 560 but was skunked all across the board. In the end I ordered 15 tubes of Tempro from vintagetrailersupply.com and added rush shipping. I also ordered some Dr. Tolley's Creeping Crack Cure from Amazon which arrived next day. I went ahead and tested it out on a few areas, including the seams above and around the vinyl blue strip (which had hidden rivets behind that were leaking):
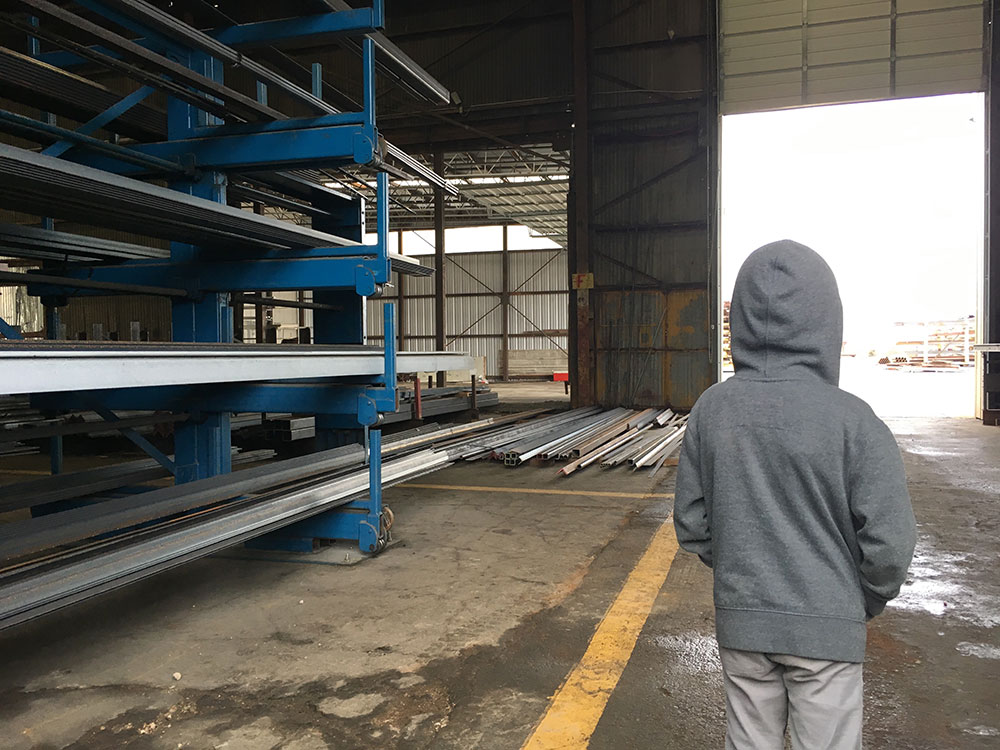
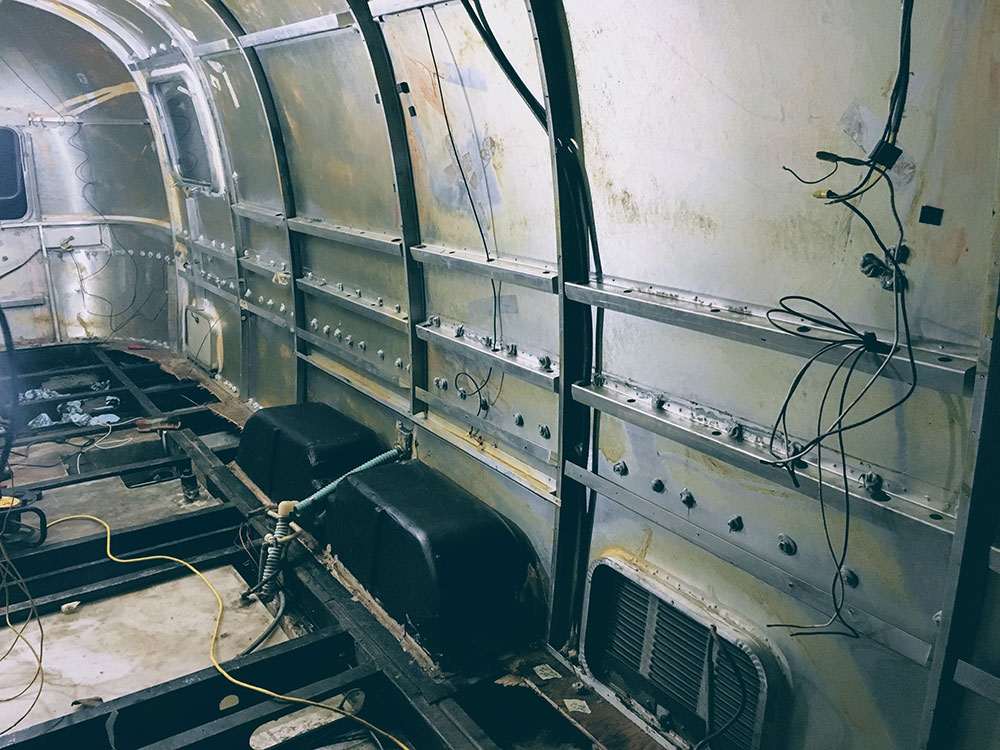
While waiting for the caulk to arrive, we decided to button up a few other loose ends, including purchasing some 2" x 2" x .25" angle iron to add support near the front of the trailer where the goucho previously was (my 6 year old son was pretty excited, as he had never seen a metal works shop before):
We also decided it would be good to give the inside walls a good scrub down with bleach (10 to 1 water mixture). Hazmat suit time, very flattering:

Finally the Tempro arrived and we started the long process of caulking every single rivet from the interior:
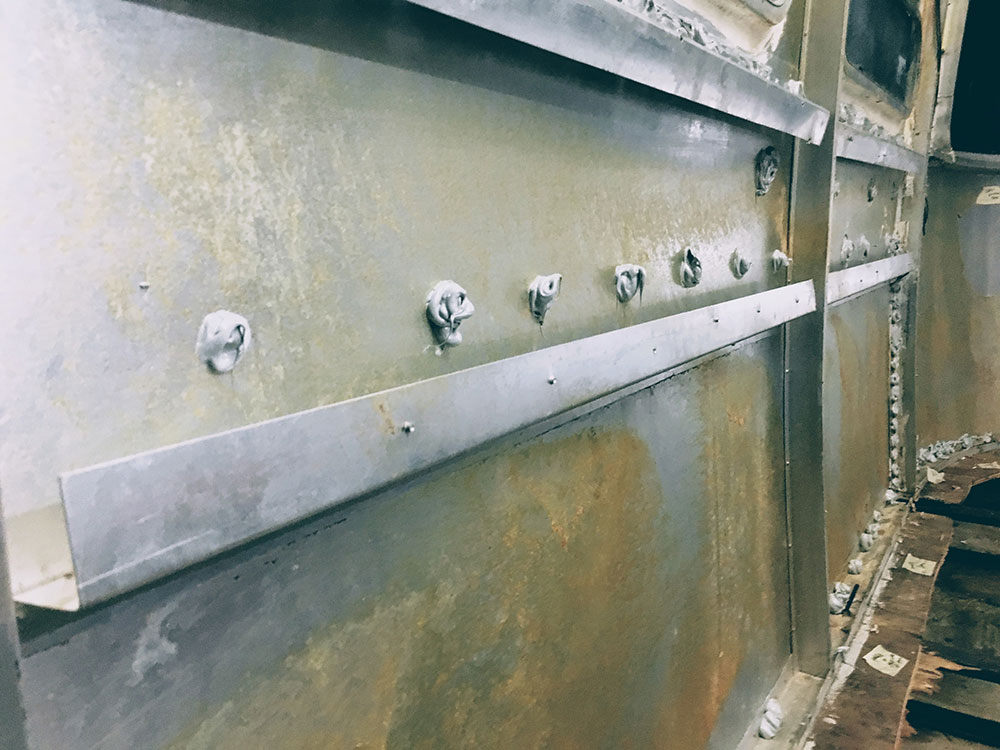
There were an awful lot of them, and we still have more to go, but 12 tubes of caulk later things are starting to look pretty good:
When it finally dried up outside, we cleaned off some of the other seams on the exterior and added some fresh caulk:
Plumbing
The plumbing systems worked pretty well, so at this point the only major change I had planned to make with regards to the holding tanks was to replace the stock monitoring system with an upgrade - in my case I opted for the SeeLevel II, specifically the 709PH variety, which will let me monitor battery, fresh, gray, black, and LPG levels as well as having an on/off switch for both the water pump and the hot water heater:

I ended up purchasing this from rvupgradestore.com, who were super helpful. They even gave me the number for Garnet (manufacturer of the SeeLevel) so I could ask some more technical questions. I'll provide more details on this during the install later.
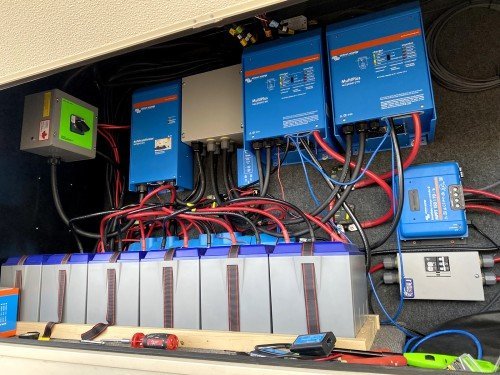
Electrical
I made some progress on the electrical front. I decided that going with an all-in-one power center solution made a lot more sense (for timing, budget, and sanity) than trying to get all separate components. In the end I called Randy from bestconverter.com who recommended the Boondocker 4 Stage Power Center 60 Amp (BPC4-60). This unit has both an AC and DC distribution board as well as a charger/converter all housed in a single, small form factor unit. It has a maximum 30AMP AC limit, but for our purposes that should be just fine. I do plan on running wire that supports a 50 amp service in the unlikely event that if we ever decide we need more power, it's a simple switch out of the power center.
I also purchased some rubber grommets for the wire runs (also from vintagetrailersupply.com), and started planning the electrical placements.
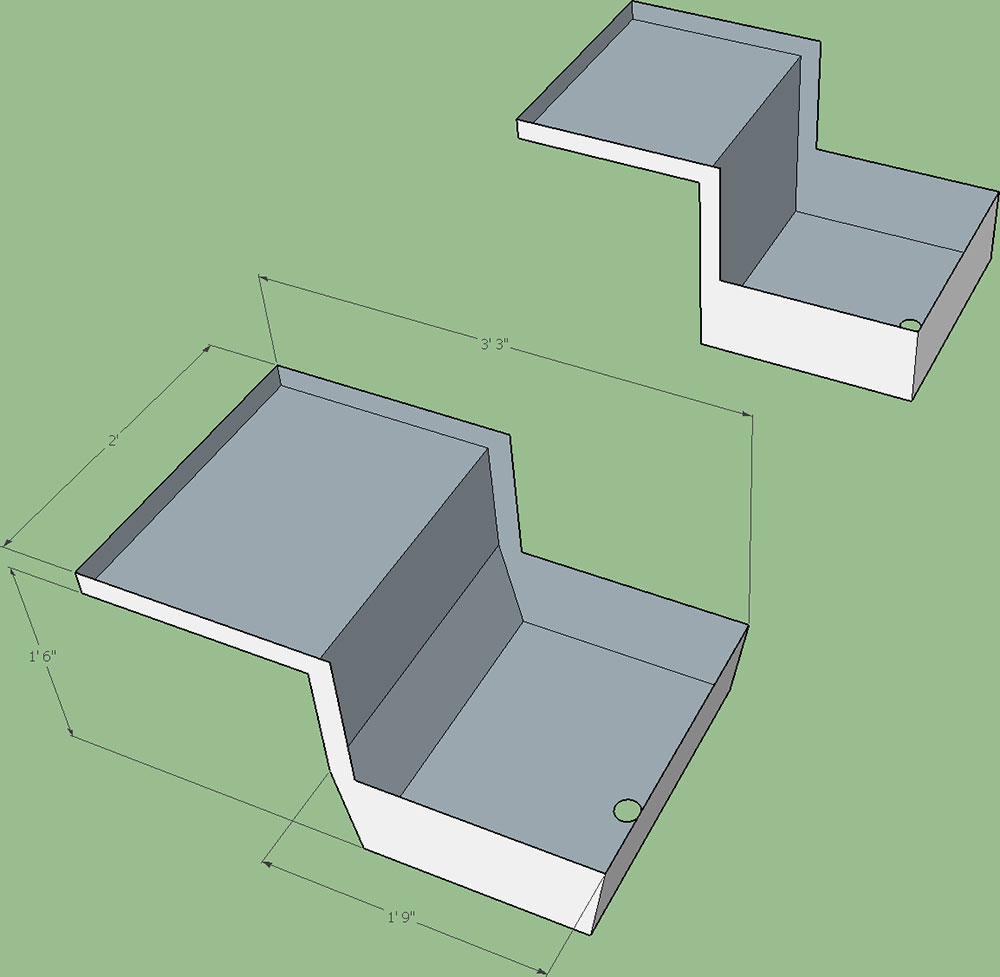
Floor Plans
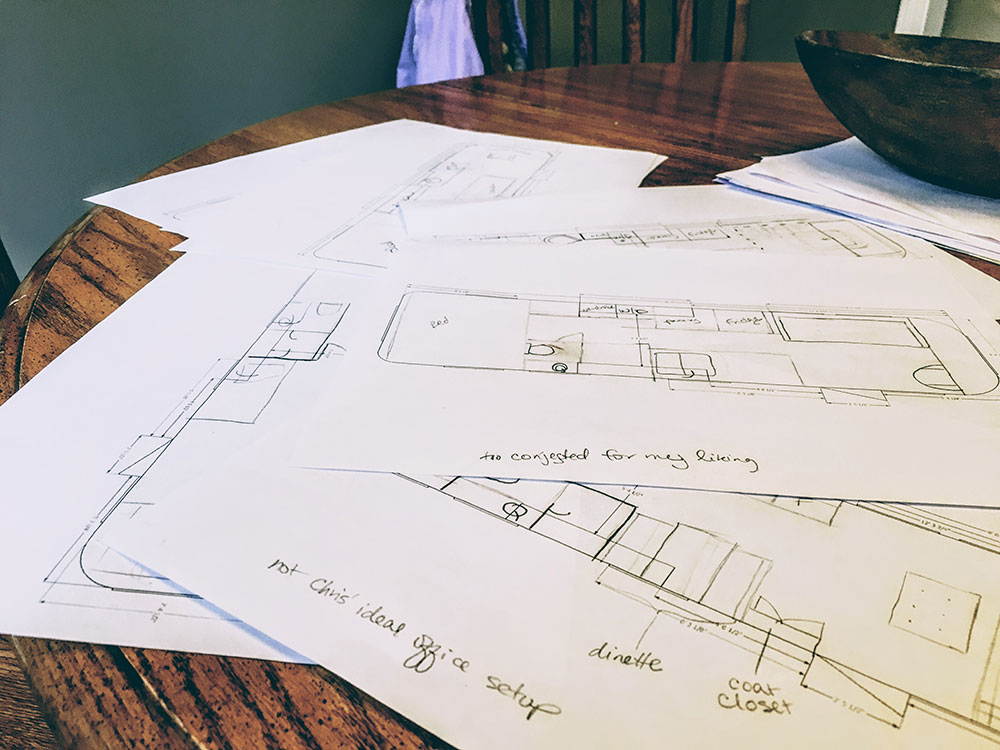
We still haven't fully locked down a floor plan, but I went ahead and created a measurement-accurate model of the airstream's dimensions in SketchUp so we could more easily finalize the floor plan (we have a lot of these printed out at this point, so it was a worthwhile investment of my time to create this):
The [expletive-here] Shower Pan
As I mentioned in a earlier post, we made a big mistake in throwing away the old wheel well shower pan. I have spent an inordinate amount of time trying to figure out a viable replacement. I started with the low-hanging fruit first - I called all of the airstream supplier websites (inlandrv.com, vintagetrailersupply.com, et cetera) but couldn't find anything that would fit our trailer. I even called airstream directly and while they have a replacement part, it wouldn't be guaranteed to fit and would cost $1500.
The next option was custom fabrication. I started by making a model of what we needed in SketchUp, with two variations to gauge differences in cost (the only difference is the flared angles of the lower pan which is how the original fiberglass one was):
Initially I wasn't set on using fiberglass versus stainless steel, so I reached out to fabricators of both materials. In the end I contacted over 20 different companies, and received an answer from about 4 of them, with quotes ranging from $500-$1500 to fabricate the shower pan. On a whim I even reached out to a plastics manufacturer to see if they had anything they would recommend (they had some options but in the end I felt that a rigid plastic would prove to be too brittle for daily use as a shower pan). I also read that some people used spray in bed liner, so I also called my local Line-X who said it was doable, but I was concerned about the longevity of this option and inability to easily see leaks so I opted against it (for now).
After speaking with (pestering) friends and family regarding the merits of going with fiberglass vs stainless steel, we decided that fiberglass would be the best, longest-lasting and lightweight option. The fiberglass fabricator I had spoke with estimated it would cost $750-$1000, which in my mind is a lot for a shower pan, but I do understand there is a lot of time and labor that goes into the fabrication process. I still can't convince myself that this is the best option, so I have spent a lot of time researching and watching detailed how-to videos on fiberglass fabrication - to that end we are going to attempt to make our own fiberglass mold out of plywood, then go through the fiberglass mat/cloth, epoxy, and gel coat process to see how it turns out. If we can make it work, it will not only teach us a valuable skill, but will also open up possibilities to fabricate the shower pan on our time in a very custom manner. I'll share details of this process when we get to working on it, which at this point will be a while down the road.
Subfloor
We purchased 8 sheets of 5/8" plywood from our local Menards. In the end I decided this would be the simplest option, and figure if the previous 5/8" thick flooring had held up for over 30 years other than couple rotted spots from water damage, this should get me by for another 30 at least. We also got a couple rolls of 4' x 25' Reflectix. As of now my plan is to use the Reflectix under the sub floor with a little sag between each frame cross member, which seems to be what airstream is doing with their newer coaches these days. If it doesn't provide us with the desired effect, I figure I can always add something else later when we inevitably drop and replace some of the belly pan.
Before we can get the new subfloor installed we need to finish removing the bolts in the c-channel:
I tried a few different tools, including an angle grinder:
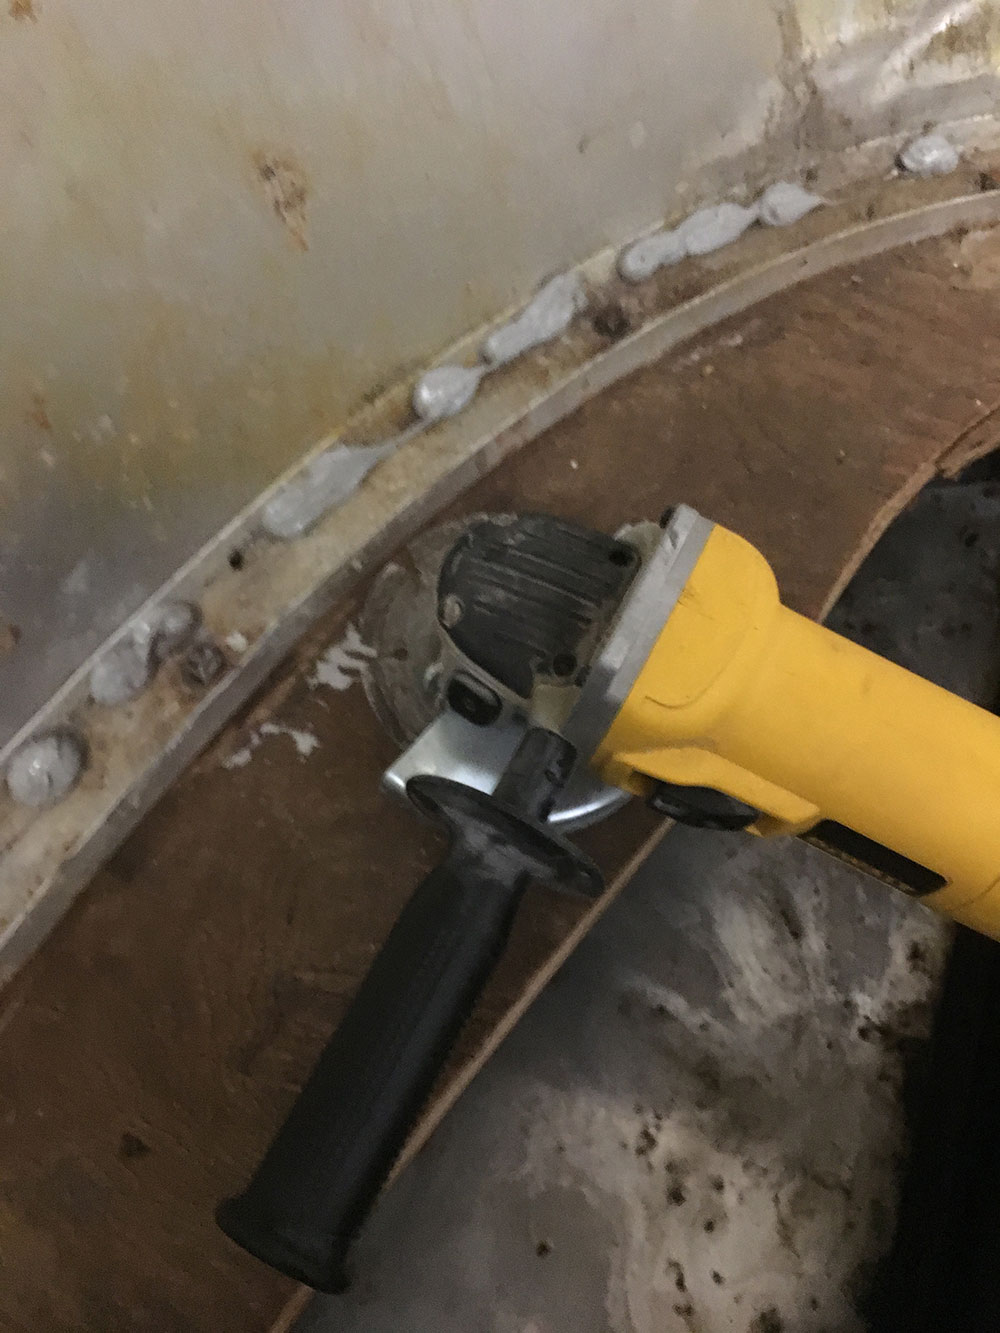
And also an oscillating multi-tool, but neither worked very well. In the end what worked the best for 90% of the bolts was to use vice-grips to either snap off the square head or to unscrew it, and after that using a screwdriver (I know I know, but couldn't find my nail set and was in a hurry) and hammer to pound the bolt down and out through the bottom:
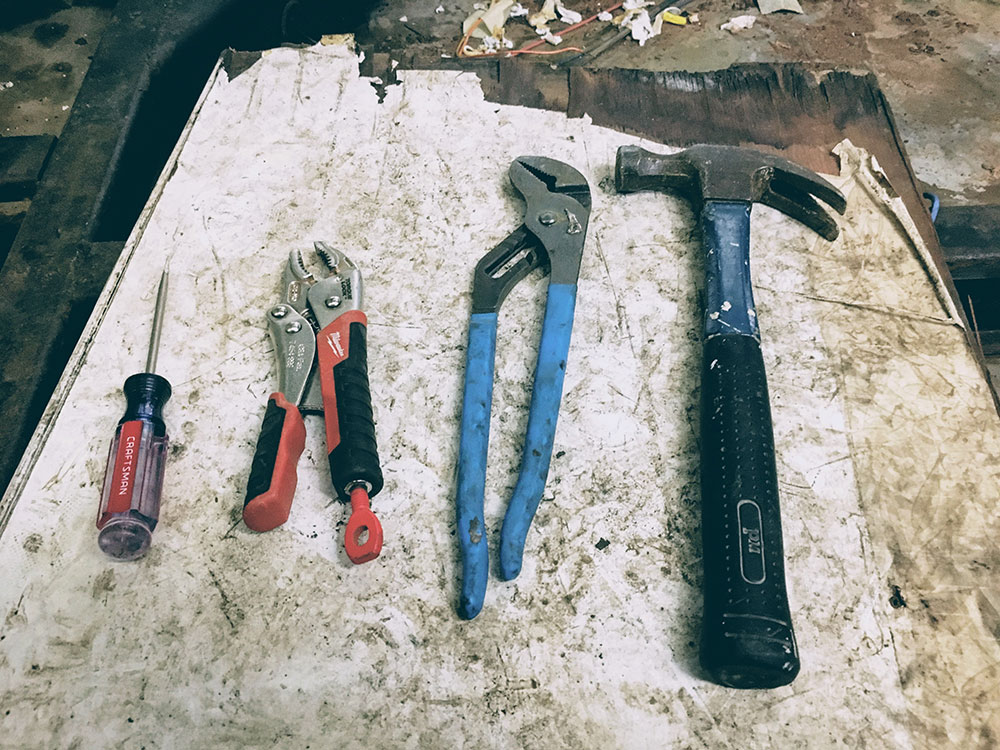
For the rest I drilled a pilot hole in the top edge of the square nut, and then drilled it out until it got to the point where I could yank it out with vice grips.
Next up, subfloor install!
Posted in the category Renovation.
Other articles to consider
 Nov1Dual Victron Multiplus 3000 3-Phase 50amp Power Issues
Trouble in Paradise
...See Details
Nov1Dual Victron Multiplus 3000 3-Phase 50amp Power Issues
Trouble in Paradise
...See Details May18Clinton Lake, KS and Sioux City North, SD
We finally are ready to...See Details
May18Clinton Lake, KS and Sioux City North, SD
We finally are ready to...See Details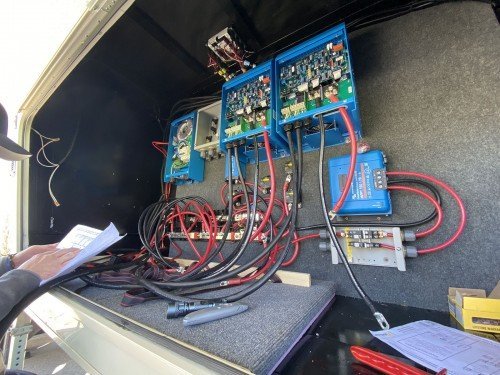 May1(Almost) The First Half of 2020
Wow, what a crazy (almo...See Details
May1(Almost) The First Half of 2020
Wow, what a crazy (almo...See Details Nov20We Sold the Airstream!As our family continues to get older (an...See Details
