« Back

How to Fabricate an Airstream/RV Shower Pan with No Mortar - Part 2

April 30th, 2017 by Chris Taulborg (SoSimple Support)


UPDATE - I would now recommend using the Schluter® Shower System or similar for an installation such as this. More info here: https://www.youtube.com/watch?v=XBZdCgSaXeI&ab_channel=Schluter-SystemsNorthAmerica


Continuing from our last article in how we are installing our custom airstream/rv shower pan with no mortar, today we started the process of taping up the seams with the the Fabric Mesh tape that we purchased with our AVM 750 Paste. Application was pretty simple, and if you have any experience with drywall corner taping, it's pretty much the same process (but with curves, hooray!).

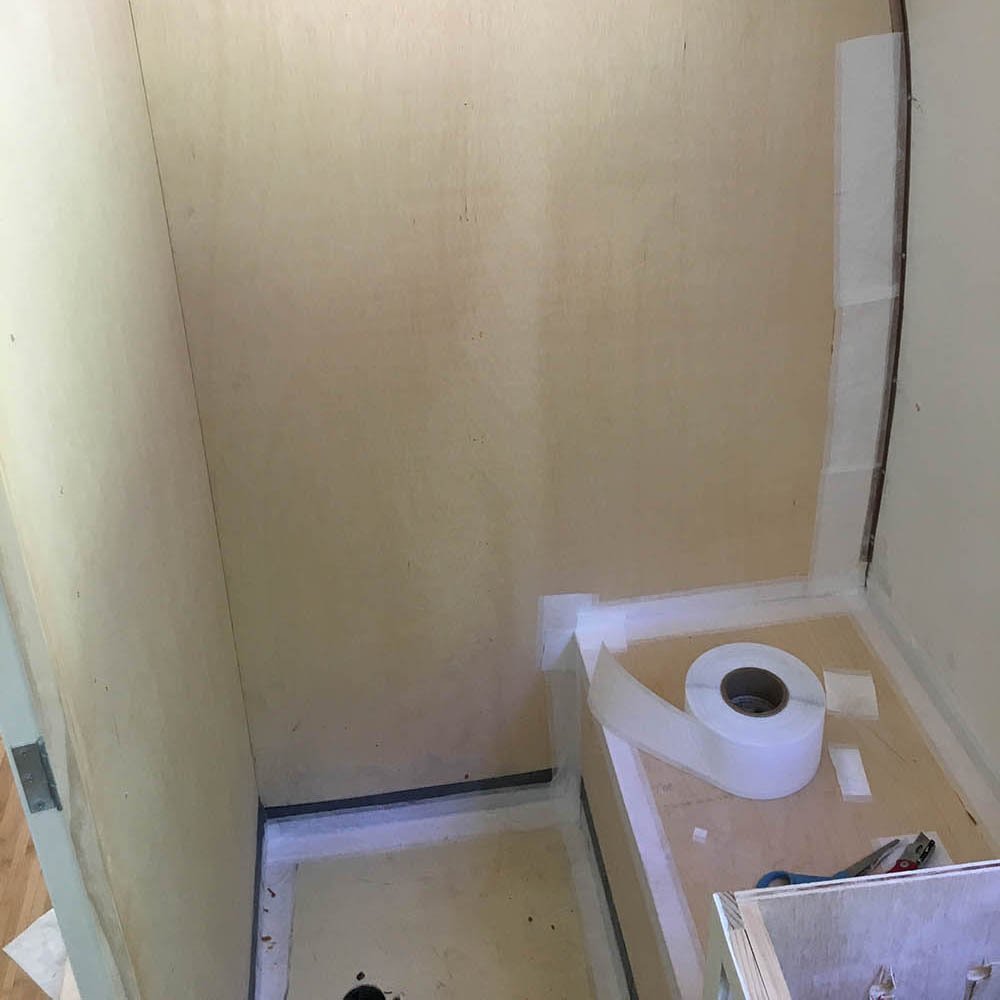
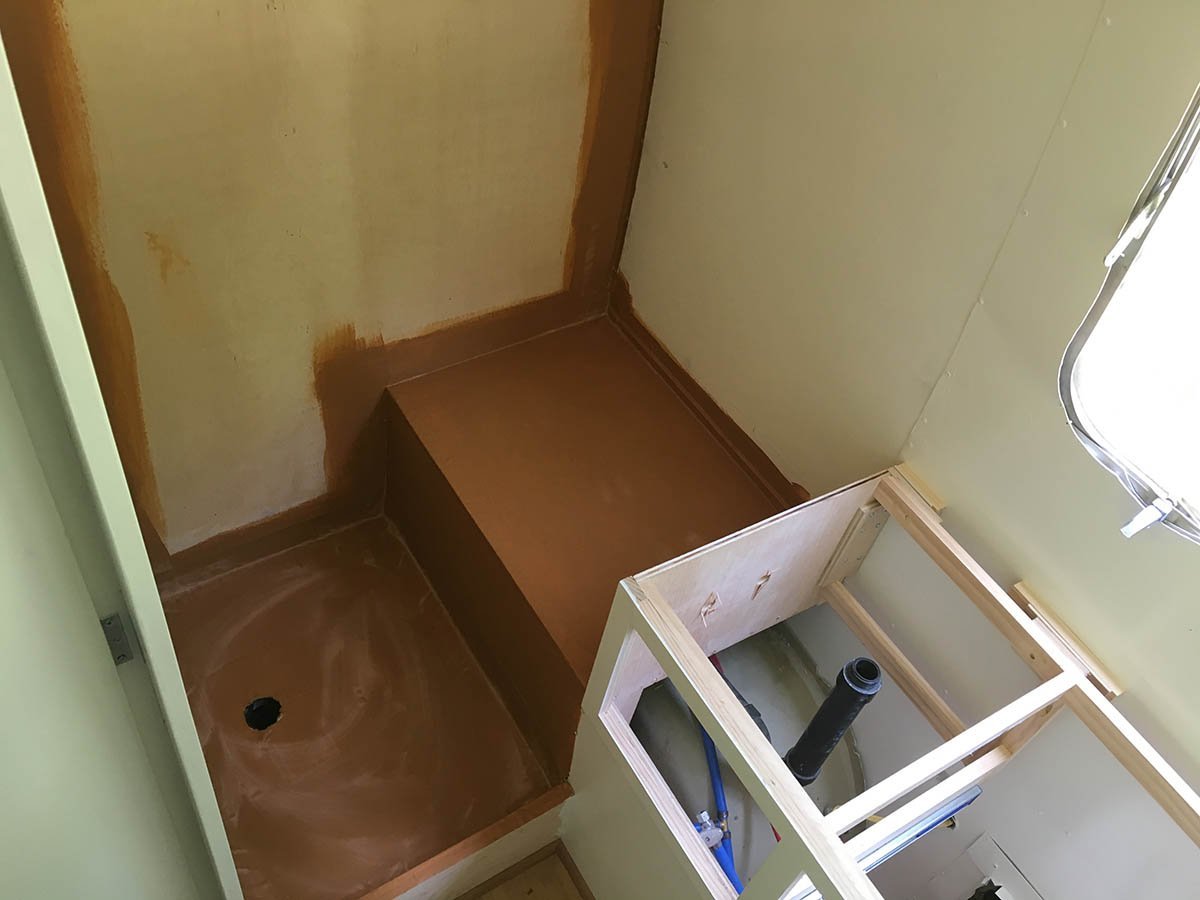
The next step in the process was applying the AVM 750 paste. This stuff is super toxic, according to the warnings on the can, so we made sure to keep all of the windows open and wear the proper safety equipment. This had the consistency of thick paint, so we were able to easily brush it on with a standard paint brush. We applied 3 coats, with extra attention spent around the seams and shower drain areas.

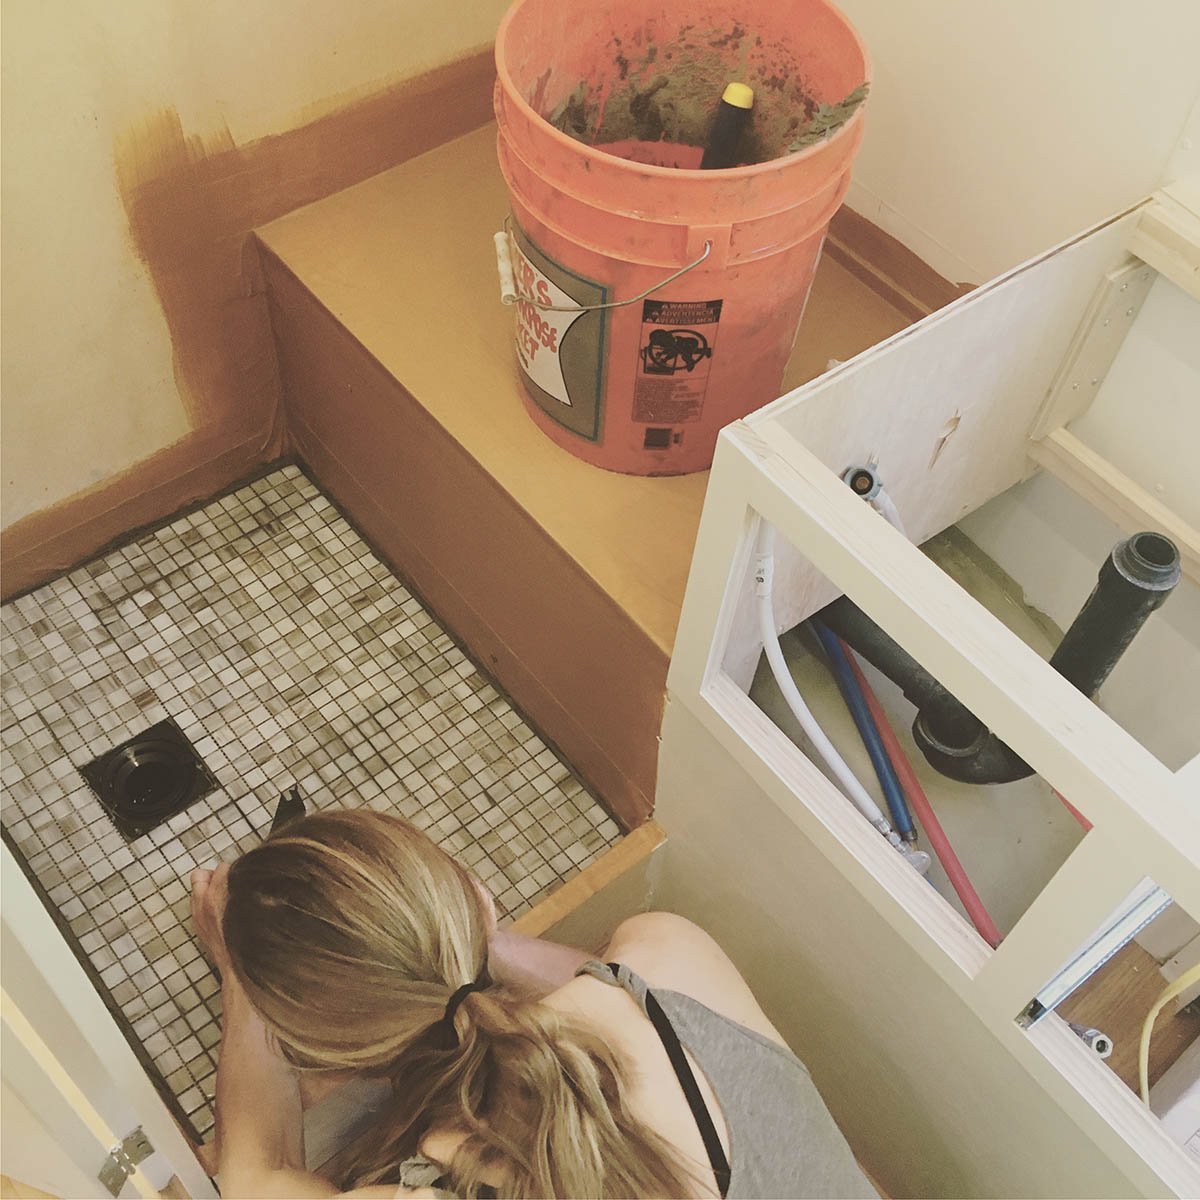
Now for the fun part, the shower floor tile! I had a couple ideas on how to install this tile, the first being to simply use construction adhesive or caulk in place of a thinset, but ultimately I decided on using an ultra-flexible standard thinset for this, as if it ended up cracking I could easily scrap it out and try something else.

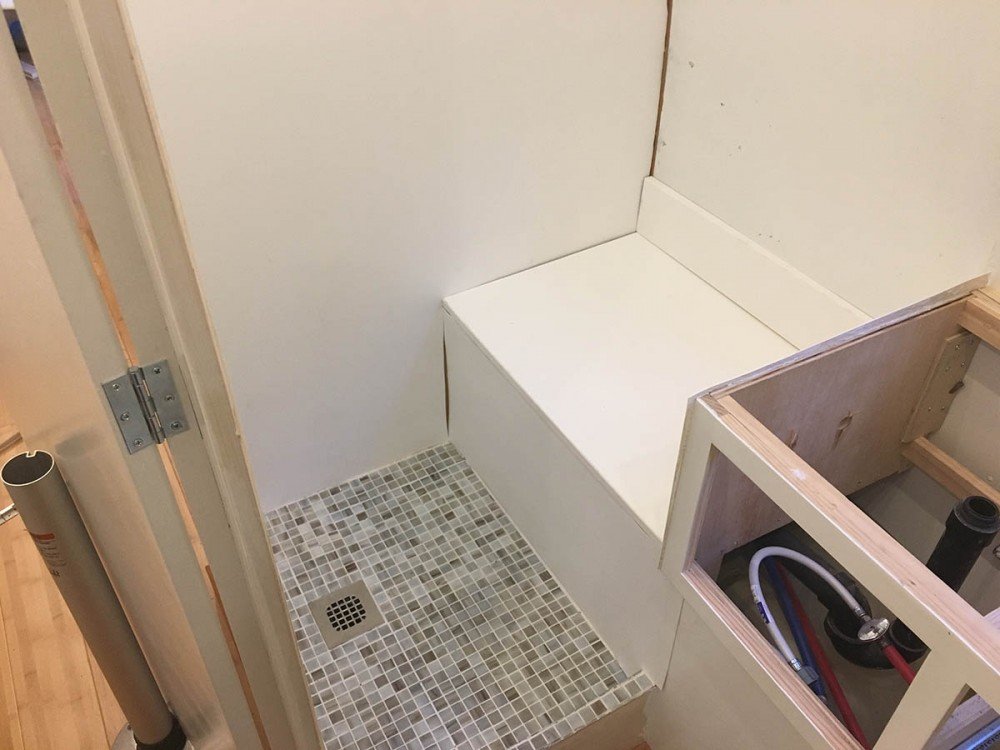
For the shower seat and seat-to-wall lip/transition, we used 3/4" thick PVC Sheeting you can purchase from any local hardware store (we got ours from Home Depot). We secured it in place with a liberal amount of construction adhesive. For the walls, we used standard vinyl bathroom wall sheets that you can by in 4'x8' sheets from any big box hardware store. We cut it to follow the contours of the airstream.

Although it's hard to see in the photo above, the water/plumbing for the shower will go through the side of the bathroom vanity (which is how it was originally setup in this particular airstream).

The final step was applying a super liberal application of bathroom/shower caulk in all of the seams.

Posted in the category Renovation.

Comments

Sara
3 years, 2 months ago
Did you all have to raise your shower to have enough angle for drain?
ChrisSara
3 years, 2 months ago
Yes, we had to raise it up by about 8 inches from the sub floor to accommodate for the drain/trap - our tank had a special "notch" that allowed us to keep the platform pretty low, so you will want to factor that into your build.
Robin I.
3 years, 6 months ago
So cool! We’re trying to figure out how we want to do our Sprinter van shower, and this seems awesome. Do you think it would be fine without tiling? I’m trying to find the lightest possible way to do the shower, so avoiding tiles and mortar if possible. Thanks!
MartineRobin I.
3 years, 3 months ago
Lightest way is to use FRP panels (fiberglass reinforced panels) available in large sheets at hardware stores. Cut to size for bottom and sides. Best to use a plastic or stainless steel shower pan below. If you want to tile just the shower pan floor area (very tiny in Sprinter) do the following: Subfloor is plywood. Paint it with anything. Use Schluter Kerdiboard instead of Hardiebacker board. Very light, pricey, but has a waterproof membrane covering both sides, great stuff! Check Youtube on application. They also have just the orange Kerdi membrane without the backerboard. But the Kerdiboard is much lighter than any other, so use it to save weight. Use MAPEI thinset mortar mixed with Polymer over the Kerdiboard. Get MAPEI (Italian) products from Lowes only. Apply thin coating to Kerdiboard or membrane and stick tile over it. Use small tiles with nonskid finish only. Size should not exceed 2 inches so there is no chance of cracking. Use 1/8” thickness to save weight. After mortar dries, mix MAPEI Grout with Grout Maximizer and fill in grout spaces. Wipe off, dry, done. MAPEI is an Italian brand and only Lowes carries it. The Polymer is a rubber compound that makes the mortar flexible. The Grout Maximizer is a rubber compound that makes the grout flexible and also has a built in sealant, so no need to use sealant. This makes the tile stick better, no cracking due to vibrations, and super flexible holding power. I did my RV bathroom and after 5 yrs not a single tile came out. Superb sticking power! I am sure you can use any grout or mortar with MAPEI products. Priced same as others. Kerdi is pricey but I don’t have other alternatives I know of. I don’t trust painted waterproofing on wood, I want a barrier there like a membrane. Or do both. Its really nice to walk on tile, I love it! I want to do the shower pan now, as I have only done the bathroom floor and raised toilet area. Looks great!
ChrisMartine
3 years, 3 months ago
Hi Martine - your timing is amazing, I just was watching some videos on YouTube from Matt Risinger (The Build Show) specifically on the Schluter system and I was planning on writing a revision at the top of this post recommending exactly that! Would have been much, much easier than the method I went with.
ChrisRobin I.
3 years, 5 months ago
I think you could get away with no tiling if you had some sort of water proof material for the floor (maybe even something similar to what is used on the walls). I’m not sure it would look the most amazing, but functionally it should be okay :).
Natasha S.
4 years, 6 months ago
I’m currently building this shower pan and am curious to how it’s held up over the last 3 years.
ChrisNatasha S.
3 years, 10 months ago
We were really happy with how the shower came out, and we had zero leaks the entire time we were out on the road! The only issue we ran into later on was with our tile installation – we didn’t put enough “mortar” and grout under the tile, and several of them started to peel up, which turned into a game of whack-a-mole after the second year. This was purely cosmetic, as the tiles were purely a decorative function and it was completely water proof under them, but still something that annoyed me – so on the last year out, while at an RV park I ended up scraping off all the tile, going to home depot and buying the same tiles (which were still available!), and redid it with a much more liberal base of flexible mortar/adhesive, and it held up fantastic after that.
Michelle
4 years, 7 months ago
Can I ask how has the tile held up over time? We are looking at doing the same application in our airstream however, concerned about cracking. I'd appreciate any insight, thanks!
MartineMichelle
3 years, 3 months ago
Michelle, see my response to Robin. The trick with tile is to use small tiles not bigger than 2 inches, 1/4" thick for light weight, and use polymer instead of water in both mortar and grout. MAPEI makes it. At Lowes.